Hide/show table of contents
Preparation - How to learn piano by yourself header image

Preparation

Videos are a fantastic tool when learning how to play the piano yourself. That’s why I will link to a lot of videos in this guide. I truly believe that will be the best option for you instead of me writing out everything from scratch and making the same diagrams that already exist.

We’re going to start from the very beginning: finding a piano. Feel free to skip this step if you already have a piano. Then we will move on to how to make sure you are building habits to get the right techniques. This is really important and can be very useful even for experienced musicians and teachers. Make sure you don’t skip this.

Throughout this guide, I will tell you how to practise each new concept and for how long. That’s the whole point of this guide – to give you everything you need in order to genuinely learn how to play the piano.

Important to bear in mind before you start: You will notice that there is a lot of theory you have to get through. When learning yourself, you have taken the responsibility yourself to understand it. When you don’t have a teacher, it’s even more important to understand what you’re doing at all times. When you have a teacher, they can say ”Just do this. For now, it doesn’t matter if you don’t understand what it means.” just like Mr Miyagi did in Karate Kid.

Here is what we will cover in this section

  • How to find a piano
  • Sitting in the right position
  • Playing with the correct technique
  • Learn how to navigate the keyboard

Finding a piano

There are 4 main types of pianos you should be aware of:

Upright acoustic pianos

Upright acoustic piano

These are the most common types of acoustic pianos. By “acoustic” I mean not a digital or electric piano/keyboard. Even though these can be quite expensive, it’s quite common for a lot of people to have one of these in their home.

Grand pianos

Grand piano

All professional recordings of classical music are usually done using a grand piano. These types of pianos are used in classical concert halls. But some people who have enough money and space have one in their home. Grand pianos have the best sound, but you will probably have to be a seasoned pianist in order to fully appreciate the difference.

Digital pianos

Digital piano

Digital pianos are really popular, especially for people who are learning how to play for the first time. You can get a good digital piano for the fraction of the price of an acoustic piano. The two most common types of digital pianos are stage digital pianos and upright digital pianos.

Stage digital pianos

Digital piano on a stand

These are portable and are usually placed on a stand. These are really suitable for smaller stage performances as they are easy to set up and pack down.

Upright digital pianos

Preparation - Man playing on an upright digital piano

These have their own stand attached to them that gives them a more aesthetically pleasing look. The sound and feel are not necessarily better than stage digital pianos, but since they are made to look nice, it’s quite common for people to have one of these in their home.

Silent pianos

This looks and functions exactly like an acoustic piano. It has strings. But the reason why these are pretty cool is because they have the feature that allows you to plug in headphones for silent practise. A lot of people really want to have an acoustic piano, but don’t get one because they don’t want to disturb neighbours late in the evening. With a silent piano, you can get both.

If you want to get a stage digital piano, I will highly recommend that you get a pedal that feels more like an acoustic piano pedal. Something like this:

Realistic digital piano pedal

This is how the pedal that usually comes with a stage digital piano looks like:

Preparation - Digital piano pedal

They still work, but the reason why I recommend getting an acoustic piano pedal is so that you will get used to the feel of a traditional, “real” piano pedal. If you only get used to a standard digital pedal you will get thrown if you ever play on a “proper” acoustic piano. This might happen if you visit a friend who has an acoustic piano. If they know that you’re learning how to play the piano, they might want to hear you play. And that’s part of the reason why you want to learn how to play the piano, isn’t it? So that you can play for others and show them what you’ve been learning?

I am not going to get into how to buy an acoustic piano. Since a digital piano is the best option for beginners, I am focusing on that.

This is because digital pianos are the cheapest, easiest to use and they don’t take up much space.

However, nothing is as nice as a “real”, acoustic piano, so if you’re interested in that and can afford it, I recommend you check out this guide.

When buying a digital piano, make sure you get one which has these features:

  • 88 keys (full sized piano)
  • Weighted keys
  • Touch response (so that you can play loudly and softly depending on how hard you press the keys, like a real piano)
  • A natural piano sound (or close to it)

Those are the essentials. Anything beyond this requires a bit of experience to fully appreciate, and for most people it’s not necessary.

I would urge you to go to a physical music shop where you can try out a few different pianos. You don’t have to buy any of those pianos, but it will give you an idea of what kind of piano you will enjoy playing. You can find a used version of the same model.

Finding out whether the piano has a natural sound can be difficult to hear. The best way to find this out is to try a few pianos in a music shop so that you can compare the sound to different pianos, including an acoustic one.

If you can afford it, I would encourage you to get a piano which isn’t too cheap. They will last longer, have a better sound and motivate you more. A used piano that you can buy cheaper than the original price is much better than a cheaper new piano.

The quality of your instrument will likely affect your love and passion for playing the piano.

If you don’t want to get a used piano, these are all good options:

Korg B2 digital piano

Roland FP-10 digital piano

Yamaha P45 digital piano

As you can see, £300 seems like the lowest price for a decent piano that will keep you interested. If you copy the name (for example: “Korg B2 digital piano”) and search it up on Google, you might find retailers who sell it for cheaper, but I doubt you can go much lower than that.

Buying second hand is also a great option. You might find someone who sells any of these pianos used on Gumtree (if you’re UK based).

You will also need a stool. I would recommend getting a stool with four legs, like this one:

Preparation - Black piano stool with four legs

The cheapest stools you will find will have this kind of cross-legged design:

Preparation - Cross legged piano stool
These type of stools are quite limited in how high they go up. And if you adjust it to the highest level, they are often unstable if you lean too much to one side. Here is a good stool I would recommend.

Position and technique

Using the right technique is incredibly important when learning an instrument. If you press the keys without thinking about how you do it, you will most likely get used to doing it your own way. This might feel ok, but it might not be the best way if you want to develop speed, play confidently and make your playing sound smooth. Playing the wrong way can also damage your joints over time.

One of the ways you progress on the piano is to make your fingers move to the right keys without having to think about every single movement. When you have repeated a certain movement enough times, your muscles will get used to moving this way, and with time you will be able to do this effortlessly. When you can do these movements without thinking too much about them, it’s your “muscle memory” that kicks in. You want to be sure that your muscle memory is developing in the right direction. Changing a habit formed by muscle memory takes time. If you’re used to playing the wrong way and your muscle memory is accustomed to that, you have to reverse that later. Correcting a habit takes time. That’s why you should get it right from the beginning.

This is where the main benefit of having a teacher comes in. With a teacher you will get instant feedback on bad use of technique, and they will correct you. Self learning all the theoretical parts of music is fine. That’s like learning maths on Khan Academy or through books and videos. But if you’re self learning an instrument, you have to pay an enormous amount of attention to your own technique. It’s really important that you regularly check in with your technique.

Here is a great way to do this: When you have practised something for a while so that it has become easy to play, don’t move on to the next thing too quickly. Now you can use this piece to practise the right technique. Since it’s easy to play, you don’t have to spend all your attention on playing the right notes. Now you can focus on playing with the right technique. This is a great way of building good technique habits.

At the end of this section you will find a checklist of what to remember for your technique (wrist, position, curled fingers etc).

I’m going to go over the most crucial things to be aware about. If you do these correctly, there is not much else preventing you from developing a good technique.

Height, Wrist, posture and arm position

Your height compared to the piano and how far you sit away from it is important. The key thing to remember is that some personal preference comes in here, but you should follow some general guidelines.

You should get a piano stool that allows you to adjust the height to your preferences.

Here is a picture of someone sitting in the correct position.

Correct piano position

When you sit at the piano with a straight back, you should look similar to this.

  • Your forearms should be parallel to the floor, or pointing a little bit downwards. If your forearms are pointing upwards, you are sitting too low.
  • Arms slightly away from your body in front of you.
  • Elbows away from your body
  • Wrists straight
  • Upper arms pointing slightly outwards.

When playing, your wrist can be flexible. However, the default position should be straight. Your wrist should not be lower than the keys, and it should not be too high up. The main thing about the wrist is to keep it in a relaxed position.

If you don’t sit with a straight back, you won’t be in the correct height and the wrist will be in the wrong position.

If you adjust the height of the digital piano too low, it will crash into your thighs. Your legs should be comfortable under the piano. So you need to adjust the stool instead.

Don’t tense your shoulders.

Lisa Witt explains this well in this YouTube video, although she is sitting a bit too high for my taste:

Curve your fingers

Pressing down the keys on the piano is almost exactly the same as typing on a computer keyboard. When typing at a keyboard, your fingers are curled and you keep them in that position when pressing down the keys.

They should look like this:

Curved fingers on piano keyboard

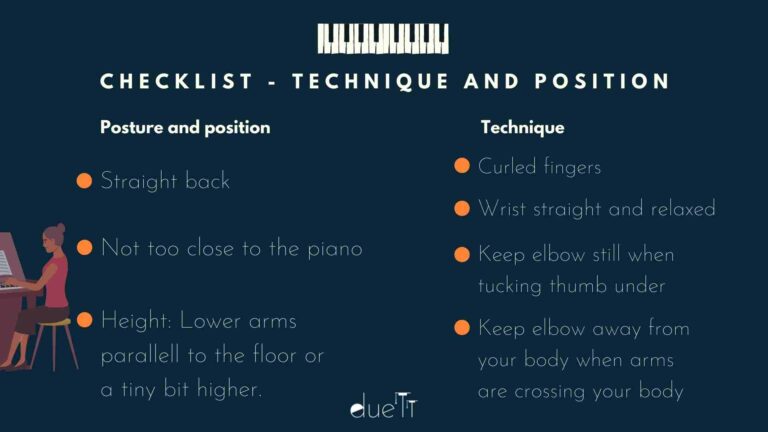
And when you press down the keys, they should maintain that position.

It helps to imagine that your fingers and palm form a little bridge that a mouse can run under. If you play with flat or straight fingers, you will squash the mouse, and that’s not good. Just ask the mouse.

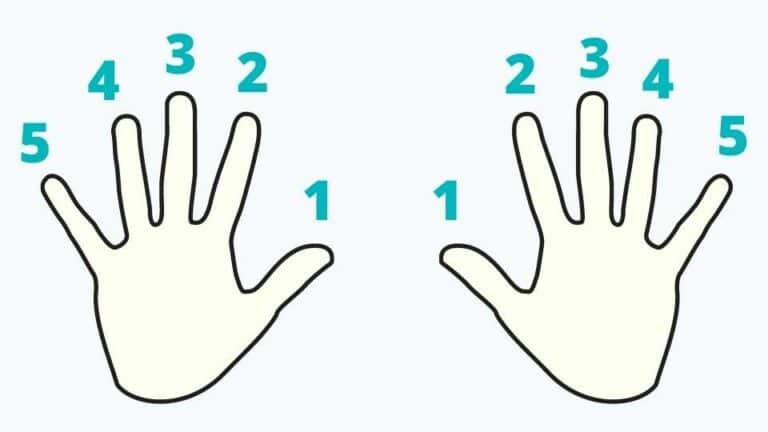
Pay some extra attention to your little finger. This is your weakest finger and it’s hard to keep it relaxed and curled. But over time you will get used to keeping even this finger curled.

Your thumb is the only finger that should not be curved. This is because it can’t be curved. Just place it on the keys in a relaxed position.

Economic movements and elbow

There is a golden rule when playing any instruments – Don’t use any more movements than necessary. Be economic with your movements.

There are a few reasons for this. Firstly, moving fingers or arms more than you have to means that it takes longer to get into the desired position. This doesn’t do any harm if you’re playing a very slow piece. But if you’re playing something fast and you use more movements than necessary you are limiting yourself in terms of how fast you can move.

Getting used to only doing the necessary movements take time. You need to build muscle memory. So if you only do this while you’re playing something fast, it won’t become a habit. You need to make this a habit by doing it all the time on everything you play so that it just becomes the way you play the piano.

That’s why you should be economic with your movements, even though you’re playing something slow..

There is one particular movement that causes extra unnecessary movement often without you noticing it. When tucking your thumb under while playing scales or arpeggios, people often raise their elbows to make it easier for the thumb to stretch to the note. Instead, just stretch your thumb. Make the thumb do the work, not your arm.

Tension

Being economic with the movements also applies to tensing only the muscles you need. Avoid any tension. All your limbs should be relaxed. Neck, shoulders, wrists and fingers are the most crucial.

How hard to press the keys

How hard to press the keys depends on what you’re playing. Sheet music often includes instructions for how loud or soft to play. But when not paying attention to those instructions, just do what’s comfortable for you. Don’t play so hard that you feel your hands and fingers are tensing unnecessarily, and don’t play so softly that you barely hear anything.

You should try to press some keys and experiment with different levels of firmness. See what’s comfortable for you as a “default” way of playing.

If you’re unsure, the main thing is to be relaxed.
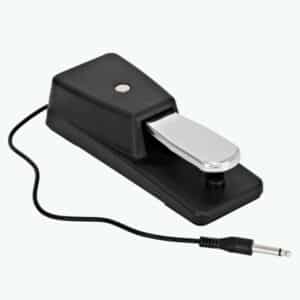
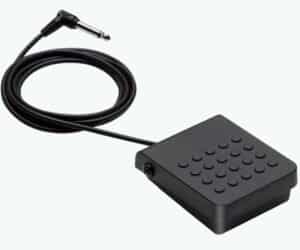
Pedal

Your feet should be sitting comfortable on the floor while playing the piano. If they can’t reach the floor, you should put a short stool under your feet. When using the pedal, your heels should always touch the floor while lifting and putting down your foot.

If you’re sitting too close to the piano so that your knee is at a 90 degree angle, you won’t be able to lift your foot off the floor comfortably while keeping the heel on the floor. Just try. 

However, don’t use the pedal yet. This comes a bit later in your piano training.

Preparation - Checklist piano technique position and posture

Now we’re going to turn or focus away from posture and position and focus on the piano as an instrument. As you progress on the piano, you might want to come back to the section about posture regularly to make sure you are developing good habits.

For the rest of this guide it’s useful to have a way of talking about which fingers to use when. To make this easy, it’s very common to number the fingers like this:

Preparation - Piano finger numbers

The same numbers apply to each hand. The thumb is finger number one, index finger number two, middle finger 3, ring finger 4, little finger 5. We will use these finger numbers a lot from now on.

Notice that the keyboard is built up of groups of two and three black keys. This is what you use to navigate the keyboard with.

In this video, you will go through this, and you will use the black keys to find your most important note, middle C:

Well done for getting through this whole section! Stage 1 is a lot more fun. Instead of only getting ready to play the piano, we are actually going to play the piano.